How do you upgrade or replace the storage in the 15-Inch Retina Display MacBook Pro models? Is it even possible?
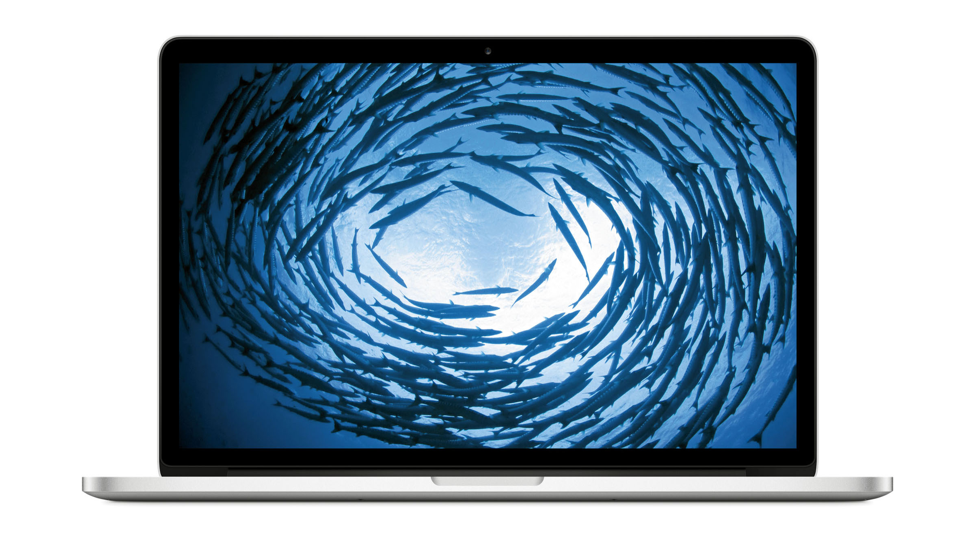
15-in Retina Display MacBook Pro Model (Photo Credit: TechRadar Pro)
Originally, the SSD storage of the 15-In Retina Display MacBook Pro model has limited options for users – the 265 GB or the 512 GB.
When Apple introduced its high-end and sophisticated MacBook Pro “Core i7” 2.6 15” Retina model on June 11, 2012, it only featured 768 GB storage by default. But, CINet initially revealed in August of the same year that MacBook Pro users already have the power to configure entry-level models as the company added 512 GB and 768 GB storage choices on them. You can do this through custom configuration. Meaning, users can upgrade the “Early 2013” models up to 768 GB, while the succeeding versions can already employ the 1 TB alternative storage.
Manufacturers do not recommend end users to upgrade their Retina Display MacBook Pro storage after buying; however, a website called Other World Computing discovered that these models use a removable SSD. That shows you can remove and upgrade the storage. They only have unique lines for every kind of proprietary blade though. To proceed with the alteration, you must accurately identify your MacBook Pro to find the right SSD.
Model Identification
It is not very difficult to identify a 15-In Retina Display MacBook because it does not have an internal optical drive, and all the earlier models feature one. Generally, the majority of the 15-In Retina Display MacBook Pro models contain a distinct Model Number which is the A1398. You can start the identification from there.
The “Mid 2012” and “Early 2013” versions utilize the same SSD, while the “Late 2013”. “Mid 2014” and “Mid 2015” use a different one. Just remember that knowing the model number is never sufficient in an SSD upgrade. It is also important to identify the external EMC Number or the software Model Identifier to get the right replacement.
The good news is that Techable diligently collected the details you might need to make your SSD upgrade convenient and fast. Refer to this table as an example:
| Retina | Year of Release | EMC | Model Identifier |
| 15-Inch | Mid 2012 | 2554 | MacBookPro9,2 |
| 15-Inch | Early 2013 | 2672 | MacBookPro10,2 |
| 15-Inch (Integrated Graphics) | Late 2013 | 2674 | MacBookPro11,2 |
| 15-Inch (Dual Graphics) | Late 2013 | 2745 | MacBookPro11,3 |
| 15-Inch (Integrated Graphics) | Mid 2014 | 2876 | MacBookPro11,2 |
| 15-Inch (Dual Graphics) | Mid 2014 | 2881 | MacBookPro11,3 |
| 15-Inch (Integrated Graphics) | Mid 2015 | 2909 | MacBookPro11,4 |
| 15-Inch (Dual Graphics) | Mid 2015 | 2910 | MacBookPro11,5 |
This is how we identify every 15-In Retina Display MacBook Pro model. To learn more about this Lookup feature, you can check our database here at Techable for more comprehensive information.
Upgrade Challenges & SSD Compatibility Information
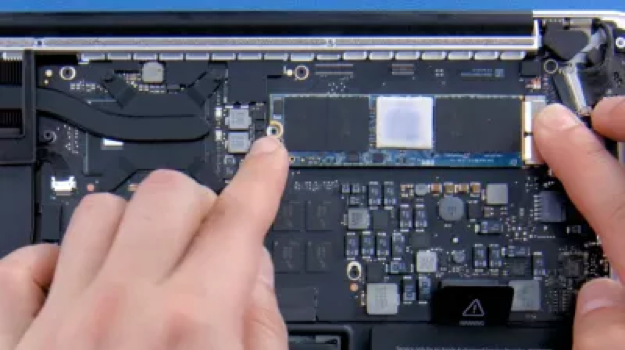
SSD Upgrade for MacBook Pro Retina Display
(Photo Credit: https://eshop.macsales.com/shop/ssd/owc/macbook-pro-retina-display/2013-2014-2015)
The pentalobe screws Apple uses in securing the SSD of their models only show that they do not suggest any upgrades. Their five-point Torx screws are uncommon. This hinders the upgrade, but it is still possible. By owning the right tool and screwdriver, you can directly access the removable SSD. As a matter of fact, Apple allows firmware upgrades so changing its default SSD should work.
There are just two different SSD designs connected to this model that you must be familiarized with. They are the 6Gb/s SATA-based SSD interface, and the PCIe 2.0-based SSD. Techable has a comprehensive explanation of this in its “Apple’s SSD explained” news article. In a nutshell, the SATA-based SSD covers the “Mid 2012” and “Early 2013” versions; while the “Late 2013,” “Mid 2014,” and “Mid 2015” models feature the PCIe 2.0-based SSD. You can not interchange the SSD types of these models because they are not compatible with one another.
Since there are restrictions in the SSD compatibility, third parties introduced a connector for SATA-based SSD to work for “Mid 2012” and “Early 2013” units, and PCIe 2.0-based flash SSD for the “Late 2013” versions and other MacBook Pro models in this line.
OWC conducted a test and discovered that the “Late 2013” and “Mid 2014” versions, which originally employ an x2 PCIe connection, perform differently when a blade SSD is installed in them. Cylinder Mac Pro uses the same SSD which features an x4 PCIe connection. This change gives a 1200 MB/s drive performance – a leap jump and improvement from the common SSD this Apple line has.
Apple claims to utilize a faster flash storage system which is 2.5 times better than the previous generation it has on most 15-In MacBook Pro models. After independent testing, OWC reiterated that the default SSD these models have featured a read speed of 2000 MB/s and write speeds of 1200 MB/s. These figures are far from the maximum speed the older systems can support through upgrades.
Basically, almost all models are compatible with larger SSDs, even those that MacBook Pro offer by default; however, there are also models that can accommodate faster SSDs. You just have to know which version fits yours.
There is a bus-powered external enclosure you can avail to repurpose your SSD. Through it, you can make your storage an external drive instead. That is another option you can consider.
How to Upgrade
There are ten screws with unique lengths that hold the bottom plate of the 15-In Retina Display MacBook Pro. Once you remove the cover of the notebook, you just need to work on a screw to disconnect the battery. That’s when the SSD pops out. It is not that difficult. You should have the right tools though to complete the task.
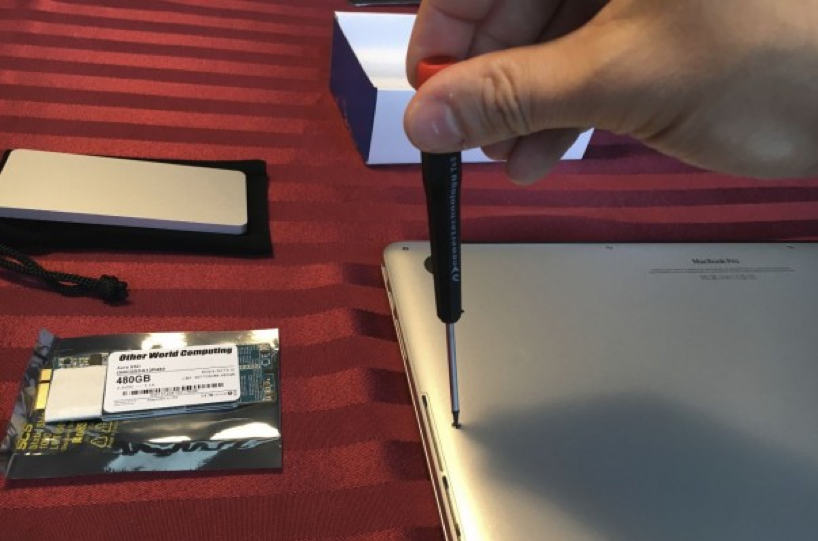
Removing Screws of 15-in Retina Display MacBook Pro Model (Photo Credit: https://www.laptopmag.com)
Before upgrading, you should back up your Mac files first. That is an assurance that if something goes wrong, your data are safe. When you remove the screw that places the SSD together, you have to use the second screwdriver. Therefore, it should be included in your kit.
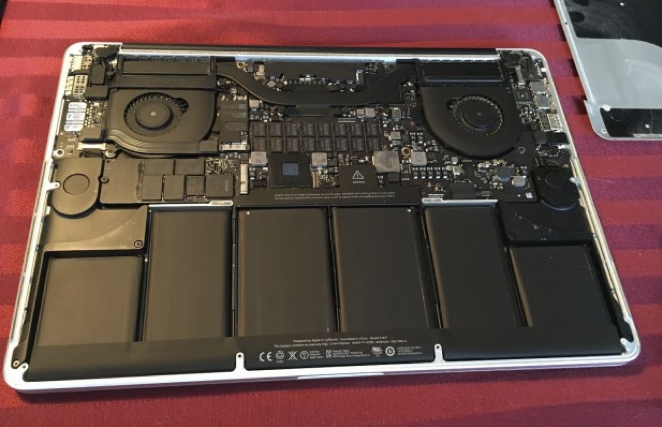
This is What You Must Uncover Before the SSD (Photo Credit: https://www.laptopmag.com)
Once you open the Applications > Utilities folder, you have to find the Migration Assistant and launch it. There are steps you have to follow in transferring your old SSD data to your Mac. There are types you can pick to transfer. This may take an hour to finish.
That’s it! When you’ve done everything correctly, your MacBook Pro will restart. Your desktop should look the way it did before upgrading SSDs. If you are comfortable with the idea, you can erase your files from the newly-installed drive and transfer it in the external storage instead.
Browse Top Categories
Popular Mac Categories
Popular Device Categories
Related Pages
No related pages found.
Welcome to Techable
At Techable, we believe technology should be accessible to everyone. Founded in 2016, we have built a transparent marketplace where users can confidently buy and sell tech. With the highest reviews in the industry, we are proud to lead the way in renewed technology.
The Smart Way to Buy Tech
It feels good to save
Love Tech?
So Do we. Stay Up To Date With The Latest In Tech.
[contact-form-7 id=”27611″ title=”footer form”]
Subscribe To Our News And Get A 10% Discount Coupon!
Quick Links
Techable.com is provided "as is" without warranty of any kind whatsoever. Techable.com, and the author thereof, shall not be held responsible or liable, under any circumstances, for any damages resulting from the use or inability to use the information within. For complete disclaimer and copyright information please read and understand the Terms of Use and the Privacy Policy before using Techable.com. Use of any content or images without expressed permission is not allowed, although links to any page are welcomed and appreciated.
Quick Links
Quick Links
Techable.com is provided "as is" without warranty of any kind whatsoever. Techable.com, and the author thereof, shall not be held responsible or liable, under any circumstances, for any damages resulting from the use or inability to use the information within. For complete disclaimer and copyright information please read and understand the Terms of Use and the Privacy Policy before using Techable.com. Use of any content or images without expressed permission is not allowed, although links to any page are welcomed and appreciated.
$10 off your next order


