How do you upgrade or replace the storage in the 13-Inch Retina Display MacBook Pro models? Is it the same storage and process as the 15-Inch Retina Display MacBook Pro? Is it possible?
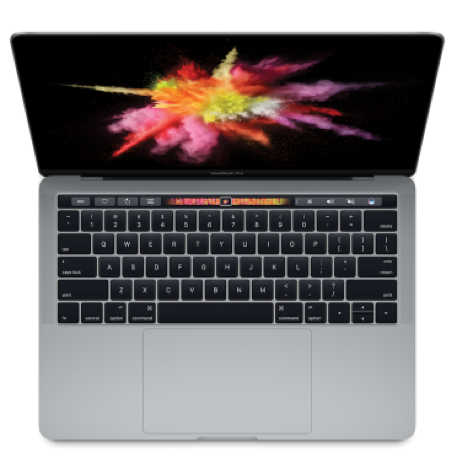
The 13-inch Retina Display MacBook Pro model (A1425, A1502) has a 13.3” color display which runs at 1290×800 while the 15-inch model (A1398) has a 15.4” color display at 1440×900. These are also known as “pixel doubled” as the 13-inch model has a 2560×1600 native resolution at 227 ppi while the 15-inch model has 2880×1800 native resolution at 220 ppi.
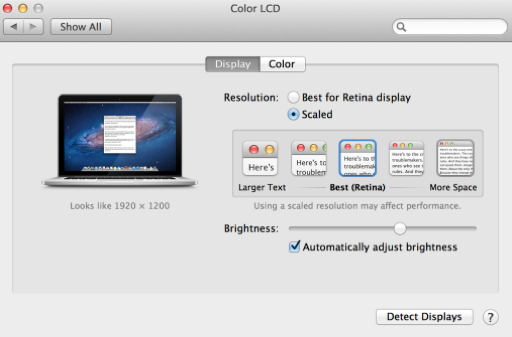
These default settings already look attractive, still, some laptop users prefer to see more than what fits on the screen, all at one time, at this high resolution. Apple provides the “scaled” resolution options available from “Large Text” to “More Space” in the System Preferences and Display icon (see below):
Quick Tip: Press and Hold the “Option” key while clicking the ‘Scaled’ button” in the “Displays” icon to see more resolutions. This shortcut is available in OS X Mavericks (10.9) and OS X Yosemite (10.10); this functionality is also in OS X Lion (10.7) and OS X Mountain Lion (10.8) “extended desktop mode”

Photo credit: Anandtech
Five (5) scaled settings in Apple’s MacBook Pro Retina Display (for 15-inch model):
1024 x 640
1280 x 800
1440 x 900 (Best Retina)
1690 x 1050
1920 x 1200
On the 13-inch models, however, scaled resolutions supported are:
1024 x 640
1440 x 900
1680 x 1050
With each scaled setting, it’s obvious that graphics performance and quality can be affected. See, Apple renders the screen at high resolution and scales it to fit the 2880 x 1800 panel (which is noticeably not in the five (5) options available, because it will then be showing very tiny text in that resolution).
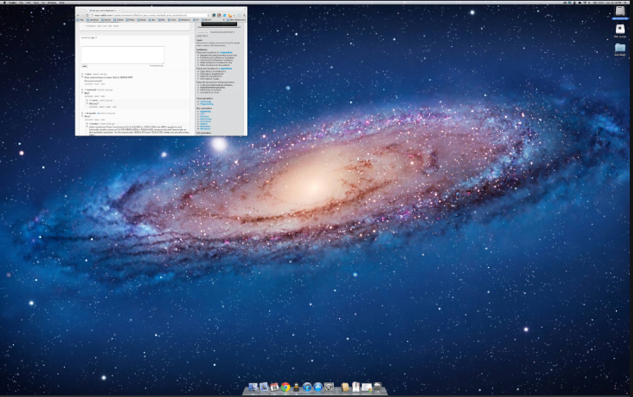
MacPerformanceGuide has a very unique comparison page of these scaled resolutions here.

Photo credit from @yourfavorite Reddit user: https://imgur.com/uE3Ml
Third-Party Software Options
As expected, Apple does not allow or support third-party hacks. If you do, however, and have the know-how to proceed, make sure to back up your computer first and do so regularly.
QuickRes
The fastest and easiest option to switch between resolutions on your Mac is QuickRes. This is supported in OS X Lion (10.7) and later versions of OS X. This was originally free for download but has now been made available for USD 4.99 which is still a reasonable and affordable buy as it is a very useful software anyway.
SwitchResX
A more sophisticated hack is SwitchResX, a shareware application that allows extensive control on (1) Monitor Resolution, (2) Color Depth, (3) Video Mirroring, (4) Display Rotation, and (5) Display Overscan among others. The application is on a free 10-ten-day trial with a EUR 14 price to register. This allows laptop users to even play around by creating and enabling new resolutions, available for many Mac OS X versions, as well as Mac OS 9. Best to pay the programmers who thought about this ingenious idea, right?

Photo Credit: Techable.com
In a Nutshell
Depending on your work needs, the scaling options may come in handy for you, especially if you are a photographer who wants to see the details of your work. The default settings are often deemed to be the best fit to make things simple and convenient for you in using multiple applications at the same time, for example. For additional control and overall user experience, the third party options and software applications mentioned may be worth considering.
Browse Top Categories
Popular Mac Categories
Popular Device Categories
Related Pages
No related pages found.
Welcome to Techable
At Techable, we believe technology should be accessible to everyone. Founded in 2016, we have built a transparent marketplace where users can confidently buy and sell tech. With the highest reviews in the industry, we are proud to lead the way in renewed technology.
The Smart Way to Buy Tech
It feels good to save
Love Tech?
So Do we. Stay Up To Date With The Latest In Tech.
[contact-form-7 id=”27611″ title=”footer form”]
Subscribe To Our News And Get A 10% Discount Coupon!
Quick Links
Techable.com is provided "as is" without warranty of any kind whatsoever. Techable.com, and the author thereof, shall not be held responsible or liable, under any circumstances, for any damages resulting from the use or inability to use the information within. For complete disclaimer and copyright information please read and understand the Terms of Use and the Privacy Policy before using Techable.com. Use of any content or images without expressed permission is not allowed, although links to any page are welcomed and appreciated.
Quick Links
Quick Links
Techable.com is provided "as is" without warranty of any kind whatsoever. Techable.com, and the author thereof, shall not be held responsible or liable, under any circumstances, for any damages resulting from the use or inability to use the information within. For complete disclaimer and copyright information please read and understand the Terms of Use and the Privacy Policy before using Techable.com. Use of any content or images without expressed permission is not allowed, although links to any page are welcomed and appreciated.
$10 off your next order


